Tuesday, April 23, 2013
Flash Stick Figure
For my stick figure i stayed very plain and first had him float down and get hit by a dart using the motion tween for both. Then i added in water and had him swim across the screen and with every motion changing the water to give it the effect that it is moving. Then i created a drain and had the water drain away off the screen when then him gets his face. Then he gets crowned king and walks the red carpet which the envelops him and disappears.
Wednesday, March 27, 2013
Tuesday, March 19, 2013
Tuesday, March 12, 2013
Tuesday, March 5, 2013
Coverse Business Card (with color scheme)
This is my Converse logo change business card. For my card I took the original star logo and incorporated it into the lettering for the O and then with the V I made it look like the bottom of two shoes and wrote Chuck Taylors on it because that it the main brand shoe from the converse company. Then I got my color scheme below entitled Stella and lined everything up and created my business card.
Monday, March 4, 2013
Converse Logos
With these i used the inspiration of the original font and and used the circle with the star and the imitated the bottom of shoes and wrote "Chuck Taylors" because it is one of there shoe brands and added the trademark star.
Wednesday, February 27, 2013
Black Swan Cards
This is my level one logo card in which I changed all the fonts and added a leaf pattern to the swan and had a pastel color background.
This is my level two card and for this one I chose a solid pink so it wasn't that appealing then added a linear gradient and then copied the swan and shrunk them in size and used different fonts.
For my level three I used a plain grey background and used the same font except on my email address to make it stand out and then added a red glow to the swan and copied it over to create a heart shape to fit the theme.
Tuesday, February 19, 2013
Frog Pointillism
Wednesday, January 30, 2013
ColorWheel
Tuesday, January 22, 2013
Film Strip
Friday, January 18, 2013
Face
This is Humble Hailey. With her face I use the shape tool and then the sub-select tool to form it into a head shape. Then I opened up my folder where I made my eye and copied it over on my face and made a copy of it and flipped it over using the scale-tool. With my nose I used the shape tool and made to circles and change the edge to feather and lightened the shade and formed it around the shape of a nose as well but lighter. Then with my lips I used a picture off of Google and used the magic wand tool and used the shape and then the color tool and set it as a custom and filled it in. Then I used the smudge tool to push the colors around to give it not such a solid look to it. Then behind the lips I added a tongue with a texture to look like taste buds. Then with the hair i used the shape tool and the sub-select tool to form it around the head and gave it a feather to lighten it and a slight wood texture.
Wednesday, January 9, 2013
Eye
With my eye I started with the circle tool and created an oval with a dark skin color pink. Then added a second layer with a white oval to fit inside the other. Then I used the circle tool and made a circle to fit inside the white layer and gave it the color blue and gave it a gradient of ripples and stretched those ripples out to create the color distortion. With the pupil I made a small black circle that was about half the size of the blue. Then I added a slight blur to it so it would blend in well. With the eye lashes I used the circle tool and made an oval and used the sub select tool to form around the eye its self to create an eyeliner look and used ovals and the sub select tool to create the eye lashes themselves and did this all around the eye. Then I created a third oval and made it black with a low feather to shade around the eyeliner to bled into the eye. Then I made an oval and used the sub select tool to shape an eyebrow.
Friday, January 4, 2013
Spot Colors

With this image I first used the magic wand tool and got the bigger areas around the tree and change them to sepia. Then I used the lasso tool and zoomed in about 200 and got the areas inside my tree between the branches and changed the back to the sepia tone.
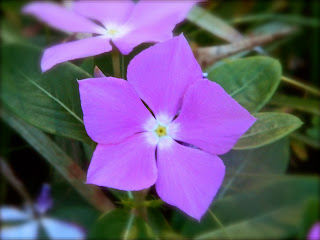
 With my flower I traced the edging around the flower with the lasso tool and filled the outside with gray scale and got the spots in between the flower between pedals with the lasso and filled it with gray scale.

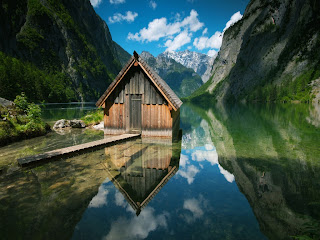
With the cabin I first used the magic wand tool and filled the sky and the mountains surrounded. Then I used the lasso tool to fill the extra spots and trace the outline of the cabin. Then I changed it all to gray scale.
Subscribe to:
Comments (Atom)


