
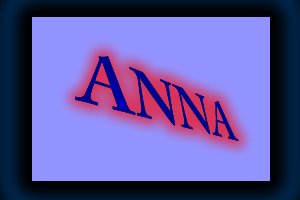
Tuesday, December 18, 2012
Textpaths
Friday, December 14, 2012
Butterfly

First I started with a black background and added two more square layers and did different shades of green. Then I first started with my flower and used the circle tool and stretched it to more of an oval and made many copy's and made the pedals two different shades of pink. Then I made the first layer and changed the lengths of each and made a second layer and did the same compressed them again and made the third layer. Then I made a plain circle and added it to the center and changed the pattern and faded the edging out to blend more into the flower. First with my butterfly I used the circle tool and changed the shape with the sub-selection tool and did the same for the inner and shrunk it down and group them together. Then I copied and reflected it over to the other side. Then I created the body with the sub-selection tool and created another oval inside it and changed it to a lighter green than the outside. Lastly for my bottom wings I did the same as the top wings but more rounded and added an inner glow of black and two dots with the circle tool and then copied and reflected it over to the other side.
Tuesday, December 4, 2012
Emotions


Loneliness: For loneliness I set the the back to a lighter more moody blue and gave it the gradient of bars and went into fill options and put in the swirl texture and lightened it to about 5% to make it more bare. Then I went into colors and stretched the bar colors farther out to have the two lines more spaced. These colors for me are a sad feeling effect and the lines keep going makes me feel sad.
Thursday, November 29, 2012
Sample Text

Tuesday, November 27, 2012
Cornucopia

To start off my cornucopia I first added an appealing background and gave it a sandy pattern to it. Then I opened a new tab and copied a leaf from the internet and traced it over and then copied it over to my first tab and copied it and lined it around the edges. Then I started with a small circle and made multiple and layered it and then added a darker one in front to add the effect of dept and that the cornucopia was hallow.Then i added a wood pattern to it and grouped it together. Then I started with my pumpkin and layered the circles with the vector tool and then added a stem with the rectangle shape. Like many of my other fruits and veggies i used the circle tool and then used the sub select to shape it. Then i used the fill tool and colored them and gave them either a pattern or gradient to give it texture. Then I changed the layer to give it a 3D effect.
Wednesday, November 14, 2012
Optimizing and Exporting Graphics
Optimizing and Exporting Graphics
When optimizing and exporting graphics things that can help you would to first set up a 4-Up frame to use and change the pictures and see which one best fits. Then your going to want to change your export default with either a GIF or JPEG setting. Then you can use the box arrow and set your quality from a range of 0-100 to get better pixel quality in your frame. Then you can use the Matte tool and change your canvas color and with its set effects or in properties. Then you have a smoothing tool which in using can make the image created less blurry and cleaner feel to it.
Nameplates

This I added a basic solid background and text box. Then changed the text color and text type.

I started off with a solid background color then a text box in all caps with my name and an appealing text color. Then I aligned my text in the middle and added a blue glow around it and stretched it out farther away from the text.
For my professional one I started with a ripple background and then another layer of a solid color box and then a text box. Then i made the text blue with an inner glow and skewed it down.Then i added a red outer glow to complement the blue.
Tuesday, November 13, 2012
Art Terminology Definitions
Art Terminology Definitions
Hue: Another name for color. This color can be measured as a location on a color and represented in as degrees which makes it different from other colors. This then classify the hue to a color in reference of the spectrum.
Tint: A hue with white added to the solid color to make it more off setting. Making the hue more of a pale and delicate color by being softened or desaturated by adding white and lighter colors.
Tone: The quality of a color. This is a determination of wheather the the color in warm or cold or otherwise known as light and dark. And as the term is said "Tone it Down" which in art means to make the color less vibrant.
Shade: A color or hues produced by adding black to the pigment. To give the color a darker more substantial look to it.
Complimentary Colors: Two colors that are opposites on the color wheel from each other. This makes them complimentary and can sometimes make the colors seem more vibrant and can seem to vibrate.
Analogous Colors: A set of 3-5 that are closely related in hues and are next to each other on the color wheel. With this one of the colors is usually the domain and the others blend well together.
Contrasting Colors: The arrangement of opposite colors. This is to create a different and exciting look and feel. The main contrasting colors are white and black.
Texture: The feeling of the object that has been created. This could also mean in art that the artist will draw to create the illusion that the picture has a texture.
Graphic Design Principles: The arrangement of different elements of a page layout. This includes the colors, size, and overall appearance.
Balance: To create equal or to reach equilibrium with the arrangement of multiple colors so that they seem even in proportion. This also means that they do not all have to be equal and even but that they work well together.
Symmetry: Separate colors of a system to create some what of a balance. this means if you were to mirror the image it would be the same or symmetrical.
Sources-
http://www.bluemoonwebdesign.com/art-glossary-4.asp
http://dictionary.reference.com
http://www.artincanada.com/arttalk/arttermsanddefinitions.html
http://arthistory.about.com/cs/glossaries/g/t_tone.htm
http://painting.about.com/od/artglossarya/g/defanalogous.htm
http://arthistory.about.com/cs/glossaries/g/c_contrast.htm
http://arthistory.about.com/cs/glossaries/g/t_texture.htm
http://desktoppub.about.com/cs/basic/g/principles.htm
http://arthistory.about.com/cs/glossaries/g/b_balance.htm
http://arthistory.about.com/cs/glossaries/g/s_symmetry.htm
Wednesday, November 7, 2012
Graphic Format
Graphic Format:
- PNG- Portable Network Graphics. Used as a replacement for GIF and handles 1 to 48 bit images but its LZW is owned by Unisys which can't be included in commercial software without paying license fees to the owners.
- GIF- Graphics Interchange Format. A popular picture and animation tool that has 256 colors. These pictures can also be interlaced to see low resolution versions of the picture before download.
- JPG/JPEG-Joint Photographic Experts Group. It is said to be the most efficient image storage method that compresses some of the data and then it throws it away. Which is the most standard format for web graphics that can store 24 bit color what makes it suitable for professional use.
- TIFF- Tag Image File Format. A 24 bit format which supported compression and made it less painful. But basically a very popular professional graphics format and the compression is LZW and owned and licensed out by Unisys is another pain.
Source: http://www.dansdata.com/graphics.htm
Subscribe to:
Posts (Atom)